
Yuzu Pineapple & Tajín Pie
Forget everything you thought you knew about pie. This recipe is breaking ALL the rules, with a spicy chili pie crust, zesty pineapple filling, tart yuzu jam, and velvety whipped cream!

Can you believe Summer just walked in, slapped Spring in the face, and said “get your ass out of here”? I certainly can’t. I’ve been so busy of late, time already feels like it’s flying by, I don’t need the seasons doing a speed-run as well, thank you.
Just a heads up, I may be taking a mid-year break soon. Emphasis on may, because as you know, I am a CHRONIC WORKAHOLIC. I also have an exciting event coming up in August! So I may need to divert some of my energy towards that. But don’t get jealous, you’re still my favorite.
Servings: 8 to 12 | Prep Time: 1 h 10 m | Cook Time: 23 to 27 minutes | Chill Time: 7 h 15 m to 9 h 15 m

Spice grinder
Food processor / Blender
Plastic wrap
Scissors
Metal tongs
Parchment paper
Pie weights
Aluminum foil
Medium heavy-bottomed saucepan
Hand-mixer / Stand-mixer
Large piping bag
Large ribbon piping tip
Offset spatula

Tajín Pie Crust:
2 tbsp Tajín, divided
7 ½ oz flour, divided
1 tbsp sugar
1 tsp chili powder
1 tsp paprika
½ tsp salt
½ cup butter, frozen, cubed
¼ cup shortening, frozen, cubed
2 tbsp Yuzu vodka, cold
2 tbsp water, cold
Pineapple Pie Filling:
5 egg yolks
1 cup sugar
½ cup cornstarch
2 cups pineapple juice
1 tbsp lemon juice
20 oz pineapple slices (fresh or canned)
2 tbsp butter, cubed
Whipped Cream:
1 tsp gelatin powder
1 ½ tbsp water, cold
1 ½ cups + 1 tsp heavy whipping cream, cold, divided
½ cup powdered sugar, sifted
1 tsp clear vanilla extract
Assembly:
7 oz yuzu fruit spread (I used Kuze Fuku & Sons)
1 tsp Tajín
Pineapple leaves, washed (optional)

Tajín Pie Crust (25 minutes + 23 to 27 minutes baking + 1 hour 15 minutes chilling)
In a spice grinder, grind 1 tbsp of the Tajín until very fine. Set aside.
In a food processor, combine 5 oz flour, sugar, both the fine and coarse Tajín, chili powder, paprika, and salt, pulsing to combine.
Add the butter and shortening, pulsing until dough begins to come together, about 15 seconds.
Scrape down the sides of the bowl, evenly distributing the dough around the blade.
Add the remaining 2 ½ oz of flour and pulse a few times, until dough is broken up.
Transfer dough to a medium bowl and drizzle in the vodka and water.
With a rubber spatula, fold and press the dough until it comes together, and is only slightly tacky.
Shape the dough into a disc, wrap in plastic wrap, and chill in the fridge for at least 1 hour.
On a liberally floured work surface, roll the dough out to a circle at least a few inches larger than your pie pan and ⅛” thick.
Carefully transfer the dough to the pie pan, dropping in the sides and then lightly pressing the dough into the corners with your knuckles.
Using scissors, trim off any excess crust.
Place the pie crust into the freezer for 15 minutes. While the crust is chilling preheat the oven to 425° F.
Remove the pie crust from the freezer and, using a fork, dock holes all over the bottom of the crust.
With a pair of metal tongs, gently press the inside of the tongs against the crust’s edge, going all the way around the pie to create a nice pattern. Be careful not to cut through the dough.
Line the inside of the pie with crumpled up parchment paper and fill with your pie weight of choice.
Bake for 15 minutes, then remove the parchment and pie weights.
Lower the oven temperature to 350° F and bake until crust is golden brown, about 8 to 12 more minutes. Cover the crust edge with foil if it starts to brown too quickly.
Let the crust cool completely, about 30 minutes. Meanwhile, prepare the filling.
Pineapple Pie Filling (20 minutes + 6 to 8 hours chilling)
In a large bowl, whisk the egg yolks together and set aside.
In a medium bowl, sift together the sugar and cornstarch so there are no lumps.
Whisk in the pineapple juice and lemon juice until smooth.
Transfer to a medium heavy-bottomed saucepan over medium-high heat.
Whisk until mixture thickens and just begins to boil, about 3 minutes.
Remove from heat and, whisking constantly, add a small amount of the hot liquid to the egg yolks to temper them.
Gradually whisk in the rest of the juice mixture, then return the whole mixture back to the saucepan. Set aside.
Drain the pineapple slices and pat with a paper towel to remove as much excess juice as possible. Cut each slice into 8 equally sized chunks.
Add the pineapple chunks to the saucepan and toss to coat.
Stirring constantly, bring the mixture to a boil over medium-high heat and continue cooking for 3 more minutes.
Remove from heat and stir in the butter until melted and fully combined.
Immediately add the filling to the prepared pie crust, smoothing the top so it’s even.
Cover with plastic wrap touching the surface of the pie and chill for at least 6 hours, or overnight.
Whipped Cream (15 minutes)
In a small heat-safe bowl, sprinkle the gelatin powder over the cold water and let bloom for 5 minutes.
Melt the gelatin in the microwave for 5 seconds. If not fully melted, microwave another 3 seconds, until there are no granules of gelatin visible.
Add in 1 tsp of heavy cream and whisk. If the gelatin firms up, heat again until it's fully liquid.
In a large bowl, with a hand-mixer or stand-mixer, whisk the heavy whipping cream on medium speed until foamy, about 15 seconds.
Gradually add the powdered sugar and vanilla and continue whisking until soft peaks just begin to form.
Reduce mixer speed to low and drizzle in the gelatin until fully combined.
Increase mixer speed to medium, whisking until firm peaks form. Do not over-mix.
Transfer to a large piping bag fitted with a large ribbon tip and set aside.
Assembly (10 minutes)
In a heat-safe bowl, warm the yuzu fruit spread in the microwave for 20 to 30 seconds, just until it is liquid.
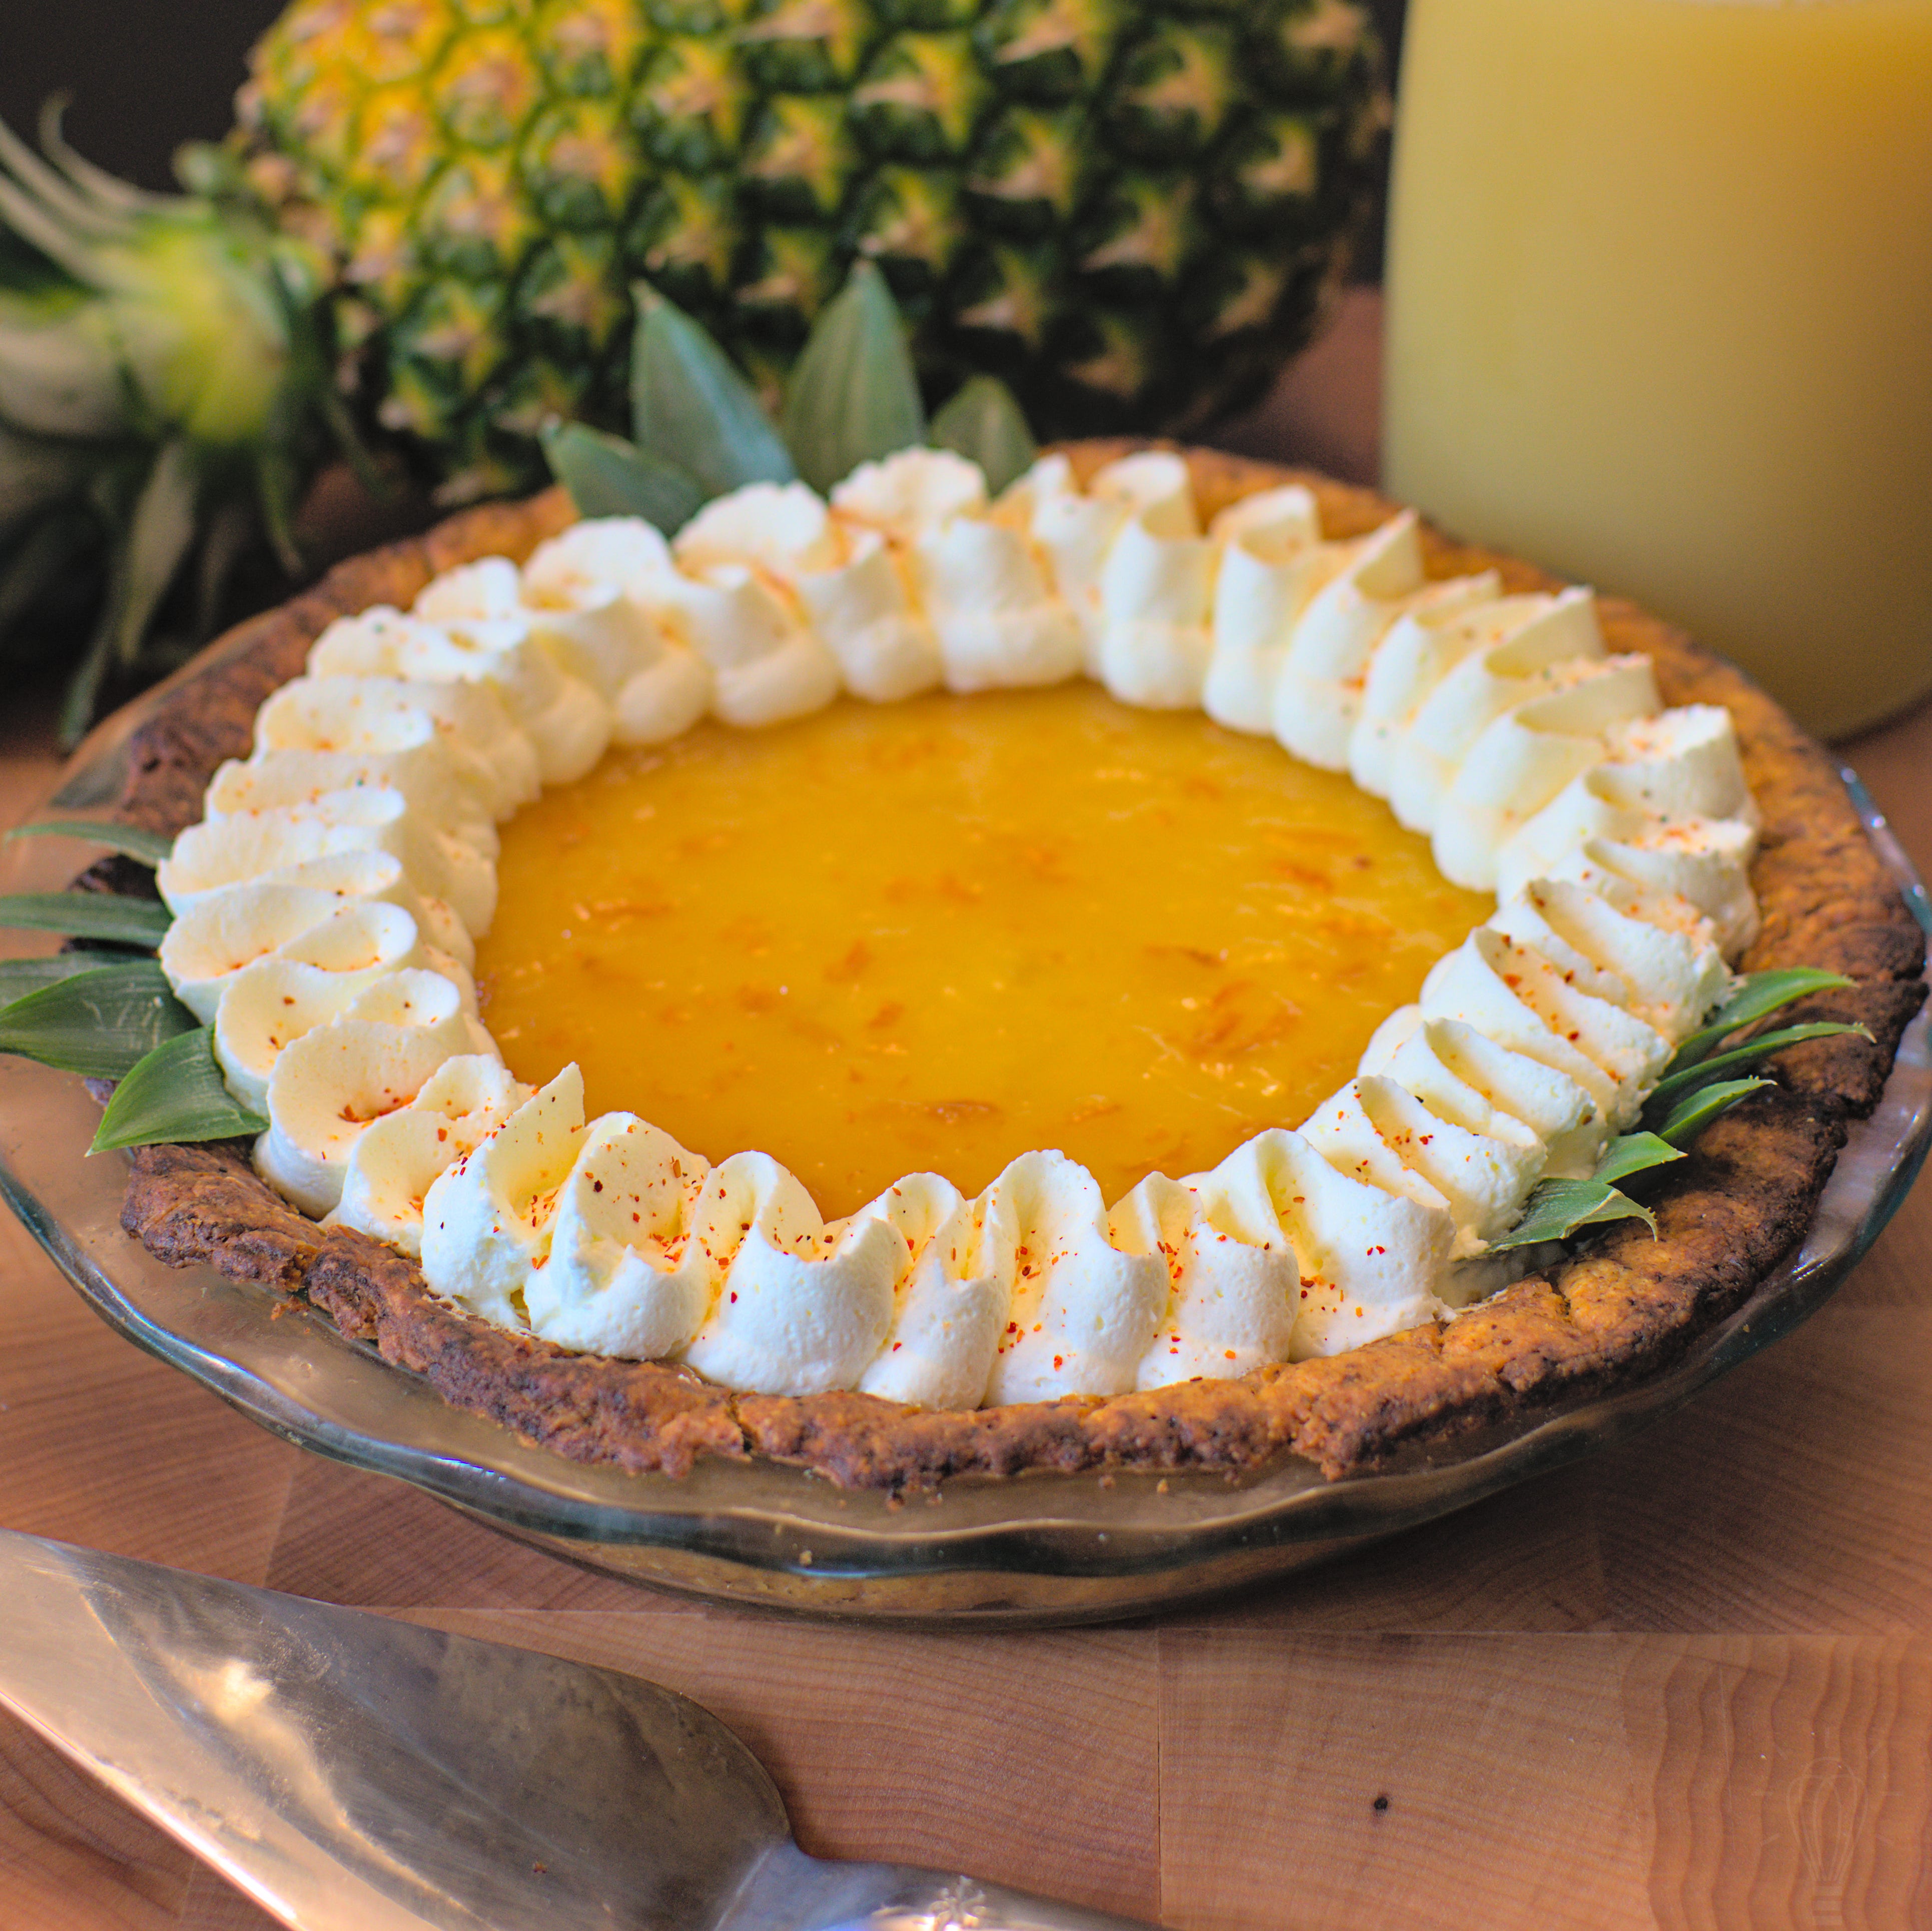
Pour the yuzu fruit spread on top of the pie, smoothing with an offset spatula to create an even layer.
Pipe the whipped cream in ribbons all around the inner edge of the pie.
Sprinkle some Tajín on top.
Optionally, cut some pineapple leaves into various sizes and decorate the edge of the pie. These are purely for decoration, so be sure to remove them before serving.
Leftovers may be stored covered, in the fridge, for up to 3 days.
Enjoy!
Be sure to check out my Best Practices page for tips on how to make this recipe yourself. Let me know in the comments if you have any questions and feel free to tag me on Instagram @made.by.shade if you make it!
-Shade